Upgrading from DSS 5 to DSS 6 | Data Source Solutions Documentation

Documentation: Upgrading from DSS 5 to DSS 6 | Data Source Solutions Documentation

Upgrading from DSS 5

This section describes the steps to upgrade from DSS 5 to DSS 6 without the need to Refresh tables. These instructions are suitable for scenarios with active replication in place to ensure that the replication continues seamlessly in the upgraded channel, picking up exactly where it left off in DSS 5.

Since DSS 6 is not compatible with DSS versions 5.x and 4.x, you must upgrade both the hub machine and agent machine to version 6.x.

Prerequisites

Consider the following general prerequisites when upgrading from DSS 5 to DSS 6:

  • Do not disable/uninstall DSS 5 before ensuring DSS 6 works properly.

  • Before disabling DSS 5, it is recommended to take a full backup of the following DSS 5 objects:

    • the DSS_HOME and DSS_CONFIG directories.
    • the DSS hub database using the DBMS native backup option.
  • Perform the upgrade during scheduled downtime, as all DSS running services (DSS remote listener) must be stopped during the upgrade.

The following step-by-step guide uses Oracle source/target/repository databases as an example to demonstrate the upgrade process. However, if you move the DSS repository to another database vendor during the upgrade, ensure you have already installed the database that will serve as the new DSS repository and created a schema/database/user with the same name as the previous DSS repository prior to performing the upgrade.

Scripts Used During Upgrade

Upgrading from DSS 5 to DSS 6 includes the step of converting one or more channels from an DSS 5 Hub to DSS 6 Hub using the dssconvert5to6 script. The script exports DSS 5 channel(s) from the DSS 5 catalog export XML file or DSS 5 hub database to the DSS 6 compatible import JSON file. The JSON file is then used to import the channels to the DSS 6 Hub.

After the channel(s) are converted, the dssconvert5to6activate script must be used to generate the dssactivate and dsscontrol commands that will activate the DSS 6 channel to capture from the point where the DSS 5 channel stopped. The dssconvert5to6activate script inspects the DSS 5 *.cap_state file for capture status (such as the transaction log’s position of the beginning of the oldest open transaction) to generate the correct values for activation of replication in the DSS 6 channel(s).

The scripts come prepackaged with the DSS 6 distribution and can be found in the DSS_HOME/script/ directory.

  • DSS version 5.3 or above is required to run the dssconvert5to6 and dssconvert5to6activate scripts.
  • The dssconvert5to6 and dssconvert5to6activate scripts must be executed on the DSS 5 system because the DSS 5 command dss is used to run the scripts.
  • dssconvert5to6

    Click here to see more information about dssconvert5to6

    NAME

    dssconvert5to6 - DSS 5 to DSS 6 channel migration

    USAGE

    <b>dss dssconvert5to6</b> <b>-f</b> <em>xmlfile</em> [<b>-c</b> <em>chn</em>]... <em>hub output.json</em>

    <b>dss dssconvert5to6</b> [<b>-c</b> <em>chn</em>]... [<b>-h</b> <em>class</em>] [<b>-u</b> <em>user</em>] <em>hub output.json</em>

    DESCRIPTION

    Exports one or more DSS 5 channels to a DSS 6 compatible import file, from either an DSS 5 catalog export file, or an DSS 5 hub database.

    OPTIONS

    Parameter Description
    -cchn Channel name. This is to convert a specific channel.
    -fxmlfile DSS 5 catalog export output file
    -hclass DSS 5 hub class
    -uuser[/pass] Hub database username and password for relevant hubs
  • dssconvert5to6activate

    Click here to see more information about dssconvert5to6activate

The dssconvert5to6activate script is supported in DSS versions up to 5.7.5.

**NAME**

**dssconvert5to6activate** - DSS 5 to DSS 6 migration of capture state  
  
**USAGE**  
`<b>dss dssconvert5to6activate</b> [<b>-c</b> <em>chn</em>]... [<b>-r</b>] [<b>-h</b> <em>class</em>] [<b>-u</b> <em>user</em>] <em>hub</em> `  
  
**DESCRIPTION**  
Inspects the DSS 5 \***.cap_state** file and generates the [**dssactivate**](/docs/dss6-command-line-interface-command-reference-dssactivate) and [**dsscontrol**](/docs/dss6-command-line-interface-command-reference-dsscontrol) commands to run in the DSS 6 system. This allows for a refresh-less upgrade from DSS 5 to DSS 6.

**OPTIONS**

<div style='overflow-x: auto'><table>
<tbody style="margin-left: 30.0px;">
<tr>
<th>Parameter</th>
<th>Description</th>
</tr>

<tr>
<td><code><b>-c</b><em>chn </em></code></td>
<td>Channel name.</td>
</tr>
<tr>
<td><strong><code>-r</code></strong></td>
<td>DSS child process to service remote DSS connections</td>
</tr>
<tr>
<td><code><b>-h</b><em>class</em></code></td>
<td>DSS 5 hub class</td>
</tr>
<tr>
<td><code><b>-u</b><em>user</em>[/<em>pass</em>]</code></td>
<td>Database username and password for relevant hubs</td>
</tr>
</tbody>
</table></div>

</details>

Notes for Upgrading from DSS 5 to DSS 6

For the following location types certain changes need to be made for operating DSS 6 smoothly. For more information, click on the required location type below:

Upgrading to DSS 6

The upgrade process includes three main phases:

Phase 1. Upgrading Test System

This phase involves the steps of upgrading the DSS 5 system running in the test system (equivalent to the DSS 5 system in the production system). In this phase, DSS 6 should be installed and configured to run independently of the DSS 5 system. After completing Phase 1 and ensuring that the replication runs smoothly in the DSS 6 system, proceed to Phase 2.

SC-Dss-Install-UpgradingDSS_ThreePhaseUpgrade_Phase1.webp

Perform the following steps to implement Phase 1 of the upgrade process:

  1. If the DSS 5 system includes an DSS 5 Agent running on a remote location, install the DSS 6 Agent on the DSS 5 Agent machine to a new directory different from the DSS 5 installation directory. DSS 6 Agent should be installed on all DSS 5 Agent machines. For the steps to install the DSS 6 Agent, see section Installing DSS Agent.

Start the DSS 6 Agent on a port other than the DSS 5 Agent is currently running on. For example, if the DSS 5 Agent listens on port 4343, start the DSS 6 Agent agent on port 4340.

  1. Create a new empty repository database for DSS 6. For the list of databases supported as repository databases, see section Repository Database in Capabilities.

  2. Install DSS Hub System. If you are installing DSS Hub System on the same machine where DSS 5 is installed, the DSS Hub System must be installed as a separate system: to a directory other than the DSS 5 DSS_HOME and DSS_CONFIG directories. For the steps to install DSS Hub System, see section Installing DSS Hub.

  3. After the installation is complete, set up the DSS Hub System, which requires connecting it to its repository database and initializing that database's repository tables. For the steps to set up the DSS Hub System, see section Setting up DSS Hub.

  4. After completing the DSS Hub System setup, the Start page will open. Click Skip channel or location creation option available at the bottom of the page.

  5. Export the DSS 5 channels to the DSS 6 compatible import file (JSON) using the dssconvert5to6 script, which is available in the DSS_HOME/script/ directory of the DSS 6 distribution. The generated file will be used to import the channel definition to the DSS 6 Hub.

    There are two ways to do this:

    • Method 1: Generate DSS 5 channel export file (XML) and convert it to DSS 6 compatible import file (JSON).

      • Use the DSS 5 command dsscatalogexport or the Export Catalogs option in DSS 5 GUI to generate the DSS 5 channel export file (XML).

      • Run the dssconvert5to6 script to convert the DSS 5 channel export file (XML) to DSS 6 compatible import file (JSON):

        dss <em>dssconvert5to6_script_path</em>/dssconvert5to6 -f <em>dss5_export</em>.xml <em>dsshub</em> <em>export_channel</em>.json
        

        To migrate a specific channel (e.g. mychannel) only, use option <b>-c</b>:

        dss <em>dssconvert5to6_script_path</em>/dssconvert5to6 -c mychannel -f <em>dss5_export</em>.xml <em>dsshub</em> <em>export_channel</em>.json
        
    • Method 2: Generate the DSS 6 compatible import file (JSON) by directly fetching data from the DSS 5 hub database.

      • Run the dssconvert5to6 script:

        dss <em>dssconvert5to6_script_path</em>/dssconvert5to6 -h oracle -u <em>dssuser/dss</em> <em>dsshub</em> <em>export_channel</em>.json
        

For more information about using option <b>-h</b> for other location types (class), see Calling DSS on the Command Line (DSS 5).

  1. In the DSS 6 system, import the channel from the DSS 6 compatible import file (JSON) generated in the previous step:

    {% tabs %}

    {% tab label="UI" %}

    1. On the left sidebar, click CHANNELS.

    2. On the Channels page, click Import Channel Definitions.
      SC-Dss-Install-UpgradingDSS_Channels.webp

    3. In the file browser, select the DSS 6 compatible import file (e.g. export-channel.json) that was generated on step 6 and click Open.

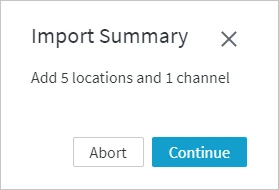
    4. The Import Summary dialog shows the details of the import. Click Continue.

      SC-Dss-Channels-ImportingandExportingChannelDefinition_ImportSummary.webp

    5. The channel will be added to the Channels page.
      SC-Dss-Install-UpgradingDSS_ImpportDSS5Channel.webp

    {% /tab %}

    {% tab label="CLI" %}

    Run command dssdefinitionimport to import the channel definition:

    dssdefinitionimport <em>dsshub</em> <em>path_to_export_channel</em>.json
    

    {% /tab %}

    {% /tabs %}

  2. If the channel contains remote locations with an DSS 5 Agent configured on them, change the agent port to the port used to start the DSS 6 Agent.

Repeat the agent configuration steps (a-f) for all locations in the channel that use an DSS Agent for connection.

{% tabs %}

{% tab label="UI" %}
  
1.  On the left sidebar, click **LOCATIONS**.

2.  Click the location name to open its **Location Details** page.

3.  In the **Agent** pane, click **Edit**.

4.  In the **Agent** dialog, specify the port of the DSS 6 Agent and click **Test Agent Connection**.

5.  Click **Save**.

    <div class="callout callout-important">

To configure the agent, click Configure Agent Service. For more information about configuring the agent, see section Configuring DSS Agent from Browser.

    ![SC-Dss-Install-UpgradingDSS_AgentConnection.webp](/static/docs/docs/dss6/install-and-upgrade/upgrade/upgrading-from-dss-5/_assets/SC-Dss-Install-UpgradingDSS_AgentConnection.webp)

{% /tab %}
  
{% tab label="CLI" %}
  
Run command [**dsslocationconfig**](/docs/dss6-command-line-interface-command-reference-dsslocationconfig) to change the port number:

```shell
dsslocationconfig <em>dsshub</em> <em>location</em> Agent_Port=<em>portnumber</em>
```

<div class="callout callout-important">

To configure the DSS 6 Agent, use command dssagentconfig. For more information about configuring the agent, see section Configuring DSS Agent from CLI.

{% /tab %}

{% /tabs %}  
  1. In the DSS 5 system, perform the following steps:
    1. Run Compare to ensure that all tables in the test source location are in sync with those on the test target location.

      {% tabs %}

      {% tab label="UI" %}

      In DSS 5 GUI:

      1. In the navigation tree pane, right-click the channel name and select DSS Compare.
      2. Select the source location on the left side and the target location on the right side.
      3. Select Row by Row Granularity in the Options tab.
      4. Click Compare.
        SC-Dss-Install-UpgradingDSS-UpgradingFrom5to6_DSS5Compare.webp

      {% /tab %}

      {% tab label="CLI" %}

      Run DSS 5 command dsscompare to compare tables between source and target locations:

      dsscompare -r<em>src</em> -l<em>tgt</em> <em>hub/hubpasswd channel</em>
      

      {% /tab %}

      {% /tabs %}

    2. Stop the capture job using command Dsscontrol. Option -F stops the capture job at the end of the next replication cycle.

      dsscontrol -c -F <em>hub</em> <em>channel</em>
      

Ensure that the latency of the capture and integrate jobs drops to zero (e.g. using the Statistics graph or checking the capture and integrate jobs' log files), so that all the router files are processed before continuing.

3.  Run the [**dssconvert5to6activate**](#dssconvert5to6activate) script to generate appropriate commands that must be run in DSS 6 system for performing a refresh-less upgrade from DSS 5 to DSS 6:

    ```shell
    dss /dss_home/script/dssconvert5to6activate -c <em>chn</em> -h oracle <em>hub</em>/<em>pwd</em>
    ```

    <div class="callout callout-note">

For more information about using option <b>-h</b> for other location types (class), see Calling DSS on the Command Line (DSS 5).

    Sample output:

    ```plaintext
    dssconvert5to6activate: DSS 5.7.0/18 (linux_glibc2.17-x64-64bit)
    dssconvert5to6activate: All generated commands have to be executed in the DSS 6 system. Please correct the hub and/or channel names manually if they are different in the DSS 6 system.

    # Commands for channel 'mychannel':
    # Activate entire channel and emit changes starting from Oracle SCN 1286643358.
    dssactivate -i 2021-08-20T15:03:04+02:00 -I scn=1286643358 myhub mychannel
    ```
  1. In the DSS 6 system, activate the DSS 6 channel using the command output in the previous step and start the Capture and Integrate jobs in DSS 6. The jobs will catch up from where the channel was stopped in DSS 5.

    {% tabs %}

    {% tab label="UI" %}

    1. On the left sidebar, click CHANNELS.
    2. On the Channels page, click the imported channel name to open its Channel Details page.
    3. On the Channel Details page, click Activate Replication at the top right.
    4. In the Activate Replication dialog, select option Custom Rewind Time and specify the required time from the output of the dssconvert5to6activate command in the previous step. For Oracle, select option Delay Emission Unit Oracle SCN and specify the required SCN number.
    5. Click Activate Replication.
      SC-Dss-Install-UpgradingDSS-UpgradingFrom5to6_ActivateReplication_CustomRewindTime.webp

    {% /tab %}

    {% tab label="CLI" %}

    Run command dssactivate to activate the channel and start the capture and integrate jobs:

    dssactivate -i 2021-08-20T15:03:04+02:00 -I scn=1286643358 -Jcap -Jinteg <em>hub channel</em>
    

    {% /tab %}

    {% /tabs %}

Phase 2. Setting Up Replication from DSS 5 Source Database to DSS 6 Target Database

This phase involves installing an DSS 6 Agent on the DSS 5 production source location and directing data flow from DSS 5 production source database via DSS Hub to DSS 6 test target database.

SC-Dss-Install-UpgradingDSS_ThreePhaseUpgrade_Phase2.webp

Perform the following steps to implement Phase 2 of the upgrade process:

  1. In the DSS 5 production system: if the DSS 5 Agent is running on a remote source location, install DSS 6 Agent on the DSS 5 Agent machine to a new directory that is different from the DSS 5 installation directory. DSS 6 Agent should be installed on all DSS 5 Agent machines. For the steps to install the DSS Agent, see section Installing DSS Agent.

Start the DSS 6 Agent on a port other than that the DSS 5 Agent is currently running on. For example, if the DSS 5 Agent listens on port 4343, start the DSS 6 Agent on port 4340.

  1. Export the DSS 5 channels to the DSS 6 compatible import file (JSON) using the dssconvert5to6 script. The generated file will be used to import the channels to the DSS 6 Hub.

Repeat steps 2-8 for all of the DSS 5 production channels until they are all converted and run in the DSS 6 test hub.

There are two ways to do this:  

-   **Method 1:** Generate DSS 5 channel export file (XML) and convert it to DSS 6 compatible import file (JSON).
    -   Use the DSS 5 command [**dsscatalogexport**](/docs/dss5-commands-dsscatalogexport-dsscatalogimport) or the **Export Catalogs** option in DSS 5 GUI to generate the DSS 5 channel export file (XML).  

    -   Run the **dssconvert5to6** script to convert the DSS 5 channel export file (XML) to DSS 6 compatible import file (JSON):  

        ```shell
        dss <em>dssconvert5to6_script_path</em>/dssconvert5to6 -f <em>dss5_export</em>.xml <em>dsshub</em> <em>export_channel</em>.json
        ```

        To migrate a specific channel (e.g. **mychannel**) only, use option `<b>-c</b>`:

        ```shell
        dss <em>dssconvert5to6_script_path</em>/dssconvert5to6 -c mychannel -f <em>dss5_export</em>.xml <em>dsshub</em> <em>export_channel</em>.json
        ```

-   **Method 2:** Generate the DSS 6 compatible import file (JSON) by directly fetching data from the DSS 5 hub database.

    -   Run the **dssconvert5to6** script:  

        ```shell
        dss <em>dssconvert5to6_script_path</em>/dssconvert5to6 -h oracle -u dssuser/dss <em>dsshub</em> <em>export_channel</em>.json
        ```

        <div class="callout callout-note">

For more information about using option <b>-h</b> for other location types (class), see Calling DSS on the Command Line (DSS 5).

  1. In the DSS 6 test system, go to the DSS user interface in the browser.

  2. On the DSS 6 test hub, import the channel from the file generated on step 2 of Phase 2 (for instructions on how to import channels to DSS 6 Hub, see step 8 of Phase 1).

  3. If the channel contains remote source locations with an DSS 5 Agent configured on them, change the agent port to the port used for the DSS 6 Agent on the DSS 5 production source machine:

Repeat the agent configuration steps (a-d) for all locations in the channel that use an DSS Agent for connection.

{% tabs %}

{% tab label="UI" %}
  
1.  On the left sidebar, click **LOCATIONS**.

2.  Click the location name to open its **Location Details** page.

3.  In the **Agent** pane, click **Edit**.

4.  In the **Agent** dialog, specify the port of the DSS 6 Agent and click **Test Agent Connection**.

5.  Click **Save**.

    <div class="callout callout-important">

To configure the agent, click Configure Agent Service. For more information about configuring the agent, see section Configuring DSS Agent from Browser.

    ![SC-Dss-Install-UpgradingDSS_AgentConnection.webp](/static/docs/docs/dss6/install-and-upgrade/upgrade/upgrading-from-dss-5/_assets/SC-Dss-Install-UpgradingDSS_AgentConnection.webp)

{% /tab %}
  
{% tab label="CLI" %}
  
Run command **dsslocationconfig** to change the port number:

```shell
dsslocationconfig <em>dsshub </em><em>location</em> Agent_Port=<em>portnumber</em>
```

<div class="callout callout-important">

To configure the DSS 6 Agent, use command dssagentconfig. For more information about configuring the agent, see section Configuring DSS Agent from CLI.

{% /tab %}

{% /tabs %}  
  1. For the target location, modify the agent connection details to point to the port of the DSS 6 Agent running on the test target machine.

  2. Once everything is configured, activate the imported channel:

    1. On the left sidebar, click CHANNELS.
    2. On the Channels page, click the imported channel name to open its Channel Details page.
    3. On the Channel Details page, click Activate Replication at the top right.
    4. In the Activate Replication dialog, select option Refresh Data into Target After Activation and then option Create Missing Target Tables and Alter or Recreate Tables with Incorrect Layout.

    SC-Dss-Install-UpgradingDSS_RefreshDataIntoTarget.webp

  3. Compare data between the tables in the DSS 5 production source database and the DSS 6 test target database:

    1. On the Channel Details page, click Compare Data at the top right.

    2. In the Compare Data dialog, click Compare Data.

      SC-Dss-Install-UpgradingDSS_Compare_5ProdSource_6TestTarget.webp

    3. To view the results of the compare job, click show...inactive on the Jobs pane: this will display all inactive events in the channel.

    4. Click the More Options icon Icon-Dss-UI-MoreOptions.webp related to the compare job and select Go to Event: this will open the Event Details page with the details about the compare event.

      SC-Dss-Install-UpgradingDSS_GoToEvent.webp

Phase 3. Upgrading Production System

This phase involves installing DSS 6 on the DSS 5 production hub machine and routing the data coming from the production source database to the production target database through the DSS 6 system.

SC-Dss-Install-UpgradingDSS_ThreePhaseUpgrade_Phase3.webp

Perform the following steps to implement Phase 3 of the upgrade process:

  1. Create a new empty repository database for the DSS Hub Server in the production system. For the list of databases supported as repository databases, see section Repository Database in Capabilities.

  2. On the production hub machine, install DSS 6. If you are installing DSS 6 on the same machine where DSS 5 is installed, the DSS 6 must be installed as a separate system: to a directory other than the DSS 5 DSS_HOME and DSS_CONFIG directories. For the steps to install DSS Hub, see section Installing DSS Hub.

  3. After the installation is complete, set up the DSS Hub System, which requires connecting it to the repository database (created on step 1) and initializing that database's repository tables. For the steps to set up the hub server, see section Setting up DSS Hub.

  4. Follow steps 6-11 in Phase 1 until all channels are migrated and activated to the DSS 6 production hub.

  5. Once all channels are running in the DSS 6 production hub, stop all channels in the DSS 5 system and ensure that the latency of the capture and integrate jobs in DSS 5 system drops to zero (e.g. using the Statistics graph or checking the capture and integrate jobs' log files).

  6. Run Compare in the DSS 6 system to check if tables in the source location are in sync with those in the target location.

    1. On the left sidebar, click CHANNELS.

    2. On the Channels page, click the required channel name to open its Channel Details page.

    3. On the Channel Details page, click Compare Data at the top right.

    4. In the Compare Data dialog, click Compare Data.

      SC-Dss-Install-UpgradingDSS_Phase3_CompareData.webp

  7. Stop the DSS 5 Agents.

    For example, to stop/kill the dssremotelistener that is running as a daemon process and listening on port 4343, execute the following command:

    dssremotelistener -k 4343
    

    To halt and destroy the dssremotelistener that is running as a Windows service and listening on port number 4343, execute the following command:

    dssremotelistener -ahd 4343