Installing DSS Hub on Windows using Zip File - DSS 6 | Data Source Solutions Documentation
Documentation: Installing DSS Hub on Windows using Zip File - DSS 6 | Data Source Solutions Documentation
Installing DSS Hub on Windows using Zip File
This section describes the requirements and step-by-step instruction on how to install the DSS Hub System on Windows using Zip file.
For installing the DSS Hub on Windows using installer, see Installing DSS Hub on Windows using Installer.
For installing DSS Agent on Windows using installer or zip file, see Installing DSS Agent on Windows using Installer or Installing DSS Agent on Windows using Zip File respectively.
The installation file for Windows is available for download in .exe and .zip format. The compressed file (.zip) distribution is normally used as an alternative for the Windows executable based (.exe) distribution. Also, the installation steps are different on both formats.
Requirements
Following are the prerequisites for installing the DSS Hub on Windows:
-
Sufficient disk space
Ensure sufficient disk space is available on the machine where this installation will be performed. For more information, see Hub Disk Requirements. -
Compatibility
Check whether the DSS version is compatible with the operating system and DBMS. Refer to the relevant Supported Platforms section or read the COMPATIBILITY section in the release notes (available under the Downloads tab in the Data Source Solutions dashboard). -
Installation file
DSS Hub System installation file for Windows (e.g. datasourcesolutions-6.1.0_21-hub_and_agent-windows-x64-64bit_ga_patch.zip). This file can be downloaded from the Downloads tab in the Data Source Solutions dashboard. For more information, see Downloading DSS. -
Database for DSS repository
DSS uses its repository database to store the replication definitions (which tables must be replicated between which 'locations') as well as run-time status (which jobs are currently running). For databases supported as a repository, see section Repository Database. -
Access to source and target locations
For the DSS Hub System to access a source or target database directly, the database connectivity (e.g. ODBC drivers) must be installed on the hub machine. For more information, see Source and Target Requirements. -
Perl version 5.6 or higher must be installed. If Perl is installed after the installation of DSS Hub System, then the hub server service must be destroyed and recreated.
-
Windows user account privileges.
-
Elevated user account privilege is required for running the DSS Hub System executable/installer. Normally this means the user must supply an administrator password interactively.
-
The user account (e.g., datasourcesolutions) that will operate the DSS Hub System must have the Log on as a service policy enabled.
Click here for the steps to configure the user policy
User account policies can be managed using the Windows Local Security Policy console accessible from Control Panel ▶ Administrative Tools. Alternatively, you can use the secpol.msc command to open this console directly. For more information about enabling this policy, refer to the Microsoft documentation.
- In the Local Security Policy window, expand Local Policies and click User Rights Assignment.
- Double-click the Log on as a service policy available in the list of policies on the right pane.
- In the Log on as a service Properties dialog, click Add User or Group to display the Select Users, Computers, Accounts, or Groups dialog.
- In the Enter the object names to select field, enter the user account name that requires this policy, and click OK.
- Click OK.
-
Install Steps
Perform the following steps in the user account that will be used for operating the DSS Hub System:
-
Configure the environment variables DSS_HOME, DSS_CONFIG, and DSS_TMP for your operating system. Each of these environment variables should be pointed to the installation directories - dss_home, dss_config, and dss_tmp.
Environment variables set using setx command are available in the future command windows only and the environment variables set using set command are available in the current command window only.
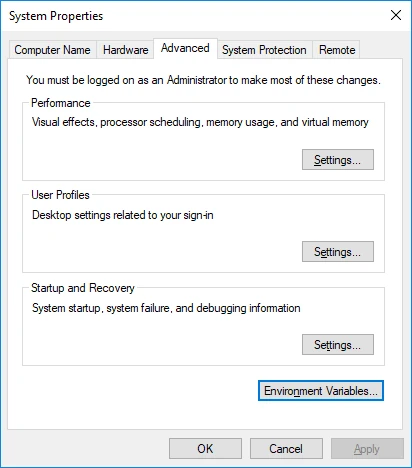
```plaintext
setx DSS_HOME C:\datasourcesolutions\dss_home
```
```plaintext
setx DSS_CONFIG C:\datasourcesolutions\dss_config
```
```plaintext
setx DSS_TMP C:\datasourcesolutions\dss_tmp
```
```plaintext
set DSS_HOME=C:\datasourcesolutions\dss_home
```
```plaintext
set DSS_CONFIG=C:\datasourcesolutions\dss_config
```
```plaintext
set DSS_TMP=C:\datasourcesolutions\dss_tmp
```

Also, add the executable directory path (e.g **C:\\datasourcesolutions\\dss_home\\bin**) to the environment variable **PATH**.

```plaintext
setx PATH "%PATH%C:\datasourcesolutions\dss_home\bin"
```
```plaintext
set PATH=%PATH%;C:\datasourcesolutions\dss_home\bin
```

<details><summary>Alternatively, environment variables can be configured using Windows GUI.</summary>

1.  Navigate to **Control Panel ▶ System and Security ▶ System ▶** **Advanced system settings**

    <div class="callout callout-note">
Alternatively, use the command sysdm.cpl to open System Properties.
2. In **Advanced** tab, click **Environment Variables...**
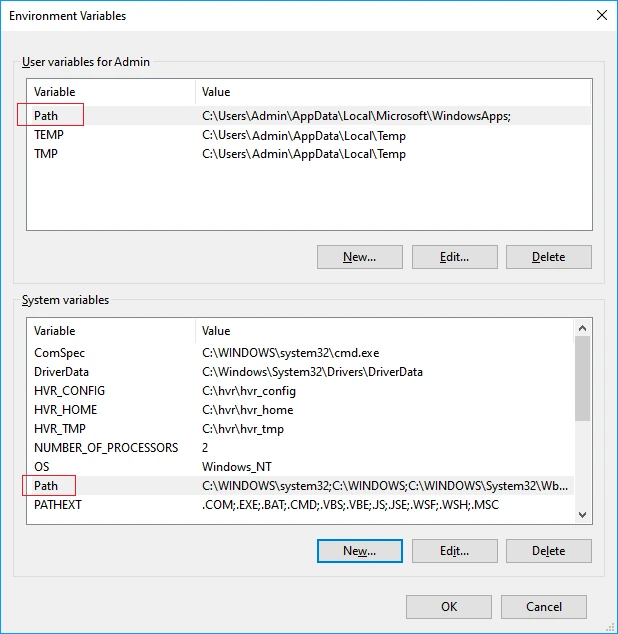
3. In the section **System variables** or **User Variables for** *user_name*, click **New**.
1. Enter **Variable name** (e.g, **DSS_HOME**) and **Variable value** (e.g, **C:\\datasourcesolutions\\dss_home**).
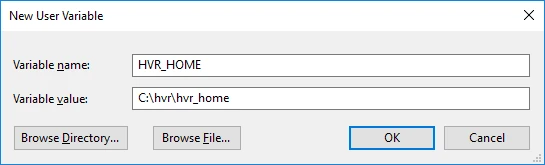
2. Click **OK**.
3. Repeated the above steps for each environment variable.
4. Add the executable directory path (e.g **C:\\datasourcesolutions\\dss_home\\bin**) to the environment variable **PATH**.
1. In the section **System variables** or **User Variables for** *user_name*, from the list of variables, select **Path** and click **Edit...**.
2. Click **New** and enter the path for the executable.
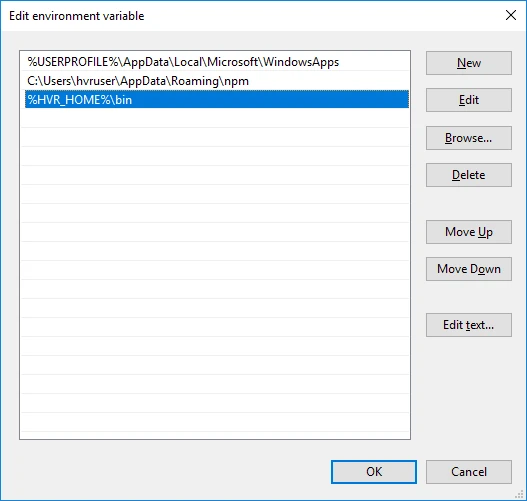
3. Click **OK**.
</details>
-
Create the installation directory - dss_home (e.g. C:\datasourcesolutions\dss_home).
md %DSS_HOME%- other directories (dss_config and dss_tmp) will be automatically created as needed.
- dss_home is regarded a read-only directory. The user files saved in this directory will be moved to a backup directory when starting the DSS Hub System for the first time or after an upgrade.
-
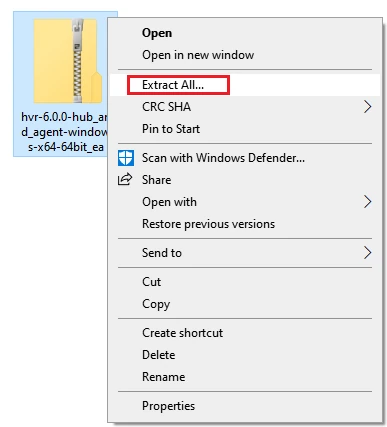
Uncompress (unzip) the installation file (e.g. datasourcesolutions-6.1.0_21-hub_and_agent-windows-x64-64bit_ga_patch.zip) into the dss_home directory.
cd %DSS_HOME%tar -xf C:\Users\Admin\Downloads\datasourcesolutions-6.1.0_21-hub_and_agent-windows-x64-64bit_ga_patch.zipAlternatively, files can be uncompressed using the 'Extract All' option in Windows GUI.
-
Configure the TCP listening port on which the DSS Hub Server will listen for connection request.
The secure HTTP protocol (HTTPS) is preferred, but this requires a private-key and public-certificate. This pair of files must have been generated for the hub machine's DNS host name, and signed by a certificate trusted by web browsers.
-
If private-key and public-certificate files are available (e.g. mycert.priv_key and mycert.pub_cert), use them to configure HTTPS:
-
Create the following directories - dss_config, etc, cert.
md %DSS_CONFIG%md %DSS_CONFIG%\etcmd %DSS_CONFIG%\etc\cert -
Copy the private-key and public-certificate files into the cert directory, and rename them as dsshubserver.priv_key, dsshubserver.pub_cert respectively.
copy mycert.priv_key %DSS_CONFIG%\etc\cert\dsshubserver.priv_keycopy mycert.pub_cert %DSS_CONFIG%\etc\cert\dsshubserver.pub_cert -
Set the HTTPS and HTTP ports by using the command dsshubserverconfig.
dsshubserverconfig HTTPS_Port=4341 HTTP_Port=4340- Port 4341 and 4340 is recommended for DSS's use of HTTPS and HTTP protocol respectively. - If HTTPS is configured, then connections to the (unencrypted) HTTP port are simply redirected to the HTTPS port
4. If the private-key is encrypted, optionally, you can set password for the private-key. ```plaintext dsshubserverconfig HTTPS_Private_Key_Password=@prompt ``` Supply a password when prompted. - If HTTPS private-key and public-certificate files are not available, configure HTTP instead: - Set the HTTP port by using the command [**dsshubserverconfig**](/docs/dss6-command-line-interface-command-reference-dsshubserverconfig). ```plaintext dsshubserverconfig HTTP_Port=4340 ``` <div class="callout callout-note">- Port 4340 is recommended for DSS's use of HTTP protocol. - Browser may give warnings that HTTP is insecure. These warnings must be ignored (until HTTPS is configured).
-
-
- other directories (dss_config and dss_tmp) will be automatically created as needed.