Creating Location - DSS 6 | Data Source Solutions Documentation
Documentation: Creating Location - DSS 6 | Data Source Solutions Documentation
Creating Location
The Create New Location page guides you through the steps of creating a new location and setting up location properties. For the steps to edit the location properties of an existing location, see the Location Details page.
If the managed secrets feature is enabled, an option USE TOKEN INSTEAD is displayed in all UI fields designated for entering secrets.
Before creating a location, ensure that the requirements for using the location are met. see section Source and Target Requirements to review the requirements for a specific location.
In the Command Line Interface (CLI), this dialog corresponds to dsslocationconfig -c.
To create a new location, perform the following steps.
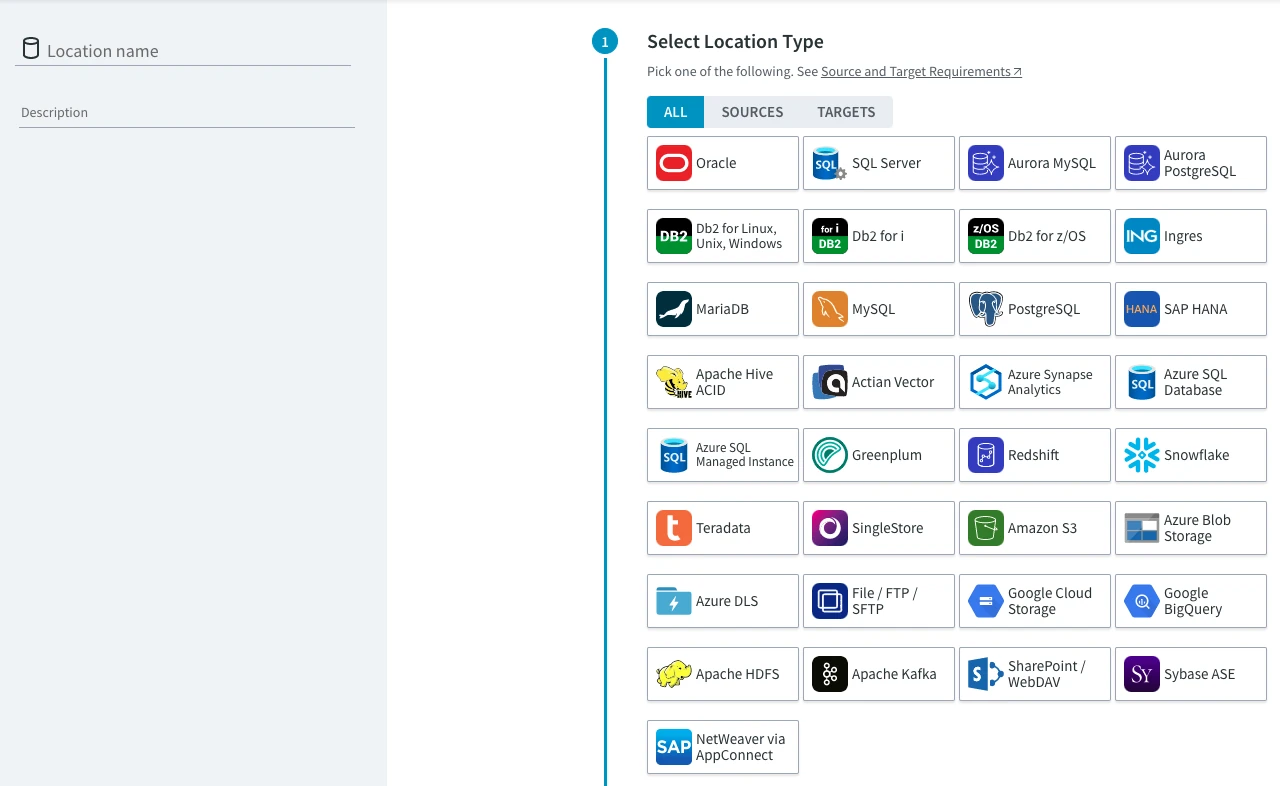
Select Location Type
-
Select one of the available location types. If you are creating a source location, click the Sources button to display only locations that are supported as source locations. For target locations, click the Targets button.
-
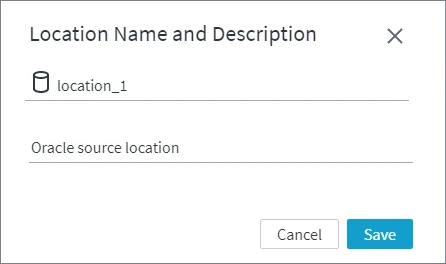
Specify the location name and optionally the description of the location on the left side pane of the Create New Location page. You can also name the location later after you complete location creation.
Restrictions applied to location names
The following restrictions are applied to location names:
-
Location name cannot exceed 12 characters.
-
Location name can only start with alphabetic or underscore, followed by alphanumeric character or underscore.
-
Only lowercase is permitted. If Caps Lock is on, it will not allow you to type in this field.
-
Location name must not begin with a number.
Examples of valid location names: _1234abcd, _abcd1234, abcd_1234, abcd1234_, _abcd1234_
-
Select Agent Connection
Choose how you want to connect the DSS Hub to the location. This can be either a direct connection or using DSS Agent. Locations can be either local (i.e. residing on the same machine as the DSS Hub) or remote (residing on a remote machine, other than the hub). DSS Agent is an installation on a remote source and/or target machine, which enables distributed configuration. For more information, see DSS Agent page.
Whenever there is a connection to Oracle RAC needed, you must select Connect via DSS Agent. For more information, see Capture from Oracle RAC.
Select the required connection type:
Connect Directly from Hub
To set up the direct connection to the location, use the default option Connect directly from hub and click Confirm Connection Method.
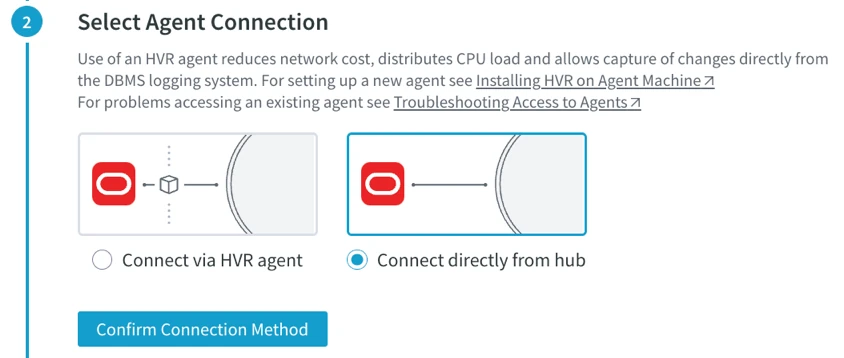
Connect via DSS Agent
To set up a connection to DSS Agent on a remote machine:
-
Click Connect via DSS Agent.
For agents located inside an Oracle RAC cluster, select Connect to agents inside RAC cluster. Skip step 2 when connecting to an Oracle RAC cluster.
<details><summary>Steps for Oracle RAC Connection</summary> To connect to DSS Agent on Oracle RAC: - Select **Connect to agents inside RAC cluster** and enter the connection details for the Oracle RAC cluster. <div style='overflow-x: auto'><table> <tbody> <tr> <th>Field</th> <th>Description</th> </tr> <tr> <td><strong>SCAN ADDRESS</strong></td> <td><p>Single Client Access Name (SCAN) DNS entry which can be resolved to IP address.</p> Example: <strong>dss-cluster-scan</strong></td> </tr> <tr> <td><strong>SCAN PORT</strong></td> <td>Port number of the Oracle RAC database available on the remote server.</td> </tr> <tr> <td><strong>SERVICE</strong></td> <td><p>Service name of the Oracle RAC database available on the remote server.</p> Example: <strong>DSS1900</strong></td> </tr> <tr> <td><strong>AGENT PORT</strong></td> <td>TCP/IP port number of the <strong><a href="/docs/dss6-command-line-interface-command-reference-dssagentlistener">DSS Agent</a></strong> on the RAC nodes.</td> </tr> <tr> <td><strong>AGENT USER</strong></td> <td>The operating system username for the RAC nodes where the <strong><a href="/docs/dss6-command-line-interface-command-reference-dssagentlistener">DSS Agent</a></strong> is running.</td> </tr> <tr> <td><strong>AGENT PASSWORD</strong></td> <td>The password for the operating system user account.</td> </tr> </tbody> </table></div> 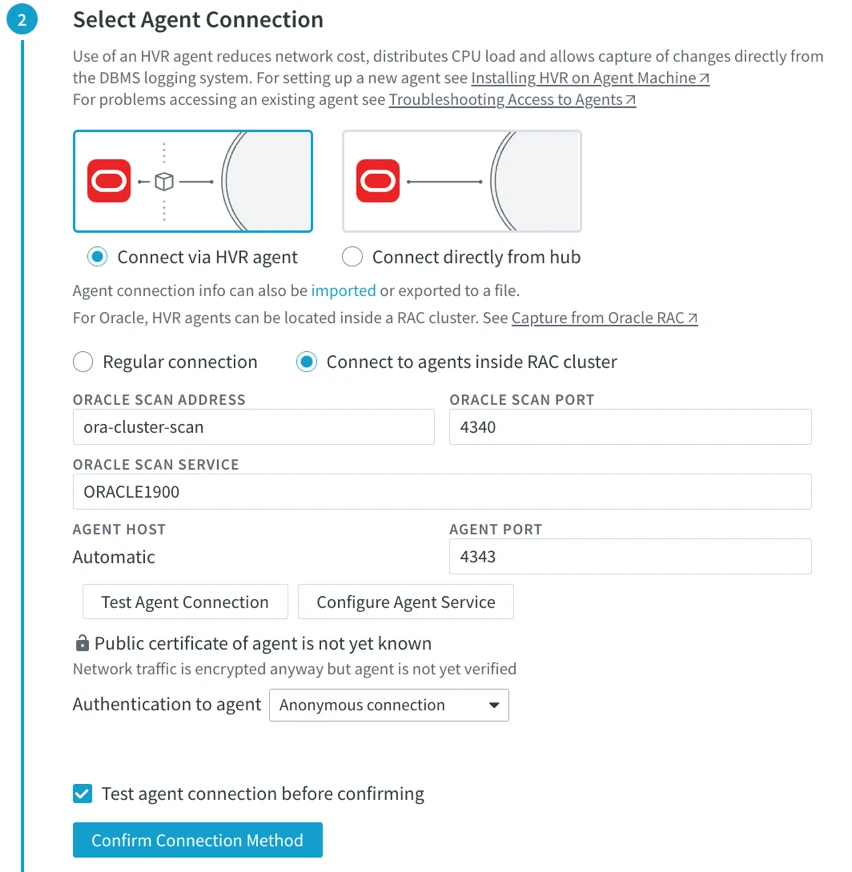 </details>-
Enter the connection details for DSS Agent. Alternatively, you can import the agent connection details by clicking the link 'imported'. For more information, see section Importing and Exporting Agent Connection.
Field Description AGENT HOST Name or IP address of the remote machine. AGENT PORT Port number defined in the DSS Agent Listener of the DSS Agent remote machine. -
If the agent service you are connecting to is not yet configured or you want to reconfigure the existing configuration, click Configure Agent Service. This will open the Agent Service Configuration dialog. For the steps to configure the agent service, see Configuring DSS Agent from Browser.
If the configuration for an existing agent service is modified/updated, ensure to reflect those changes in all locations that use this agent service. For example, if the password of an agent user is updated, then that user's password must be updated in all locations that use this agent service.
<div class="callout callout-note">The agent service can also be configured later on the Location Details page.
-
-
Select a method to authenticate to the agent service in Authentication to agent and supply the required credentials, if applicable. For more information, see User Authentication.
The values displayed/enabled in this field depend on the current agent service configuration.
-   **Anonymous connection**: enabled if the agent authentication mode is set to **Anonymous connections only** or **Allow both anonymous connections and ones with an agent user**.

-   **Username and password**: enabled if the agent authentication mode is set to **All connections require an agent user** or **Allow both anonymous connections and ones with an agent user**.

-   **Kerberos**: enabled only if the agent authentication mode is set to **All connections require an agent user** or **Allow both anonymous connections and ones with an agent user** and an agent user with **Kerberos** authentication is configured.
- If **Username and password** is selected: 1. Specify the user name (**AGENT USER**) and password (**PASSWORD**) of the agent user. **** - If **Kerberos** is selected: 1. Specify the Kerberos server principal in [**AGENT SERVER PRINCIPAL**](/docs/dss6-property-reference-location-properties#agentserverkerberosprincipal). 2. If required, select the advanced Kerberos authentication options for Hub: - **Kerberos client principal** - **Default Kerberos client principal of hub server's OS user**`default`:For authentication, use the default Kerberos client principal of the operating system user under which the DSS Hub is running. - **Specific principal**: Use a user specified Kerberos client principal for authentication instead of the default client principal. Enter the name of a specific Kerberos client principal that you want to use for authentication. - **Hub-side Kerberos configuration for location's principal and verifying agent** - **Default of hub server's OS user**`default`: For authentication, use the default Kerberos ticket of the operating system user under which the DSS Hub is running. - **Specific keytab file**: Use a user specified Keytab file for authentication instead of the default option. Enter the name of a keytab file (with complete file path) that you want to use for authentication. - **Specific ticket cache file**: Use a user specified ticket cache file for authentication instead of the default option. Enter the name of a ticket cache file (with complete file path) that you want to use for authentication. 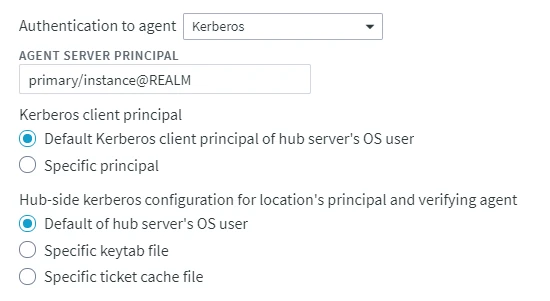-
Click Test Agent Connection to verify connection to the agent.
-
Click Confirm Connection Method.
Configure Location Connection
-
Provide details required to establish a connection to a database or a file system. For more information about the connection properties for the location type you are creating, click link "Location Connection for...".
The set of properties will differ depending on the location type you are connecting to. For more information on the connection properties for each location type, see section Location Connection.
- Once you configured the location connection, click Confirm Connection Details.
Configure Capture/Integrate
- Set up various capture or integrate parameters to define the behavior and performance of the capture or integrate process on the location, e.g. Capture Method, Intermediate Directory for file locations, Integrate Staging Directory, etc.2. Once the capture and integrate parameters are configured, click **Confirm Capture/Integrate**. 3. Click **Save Location** to complete location creation. Click **Save**.
The set of properties will differ depending on the location type you are creating. For more information about each parameter you are configuring in this step, click the link displayed under that parameter.
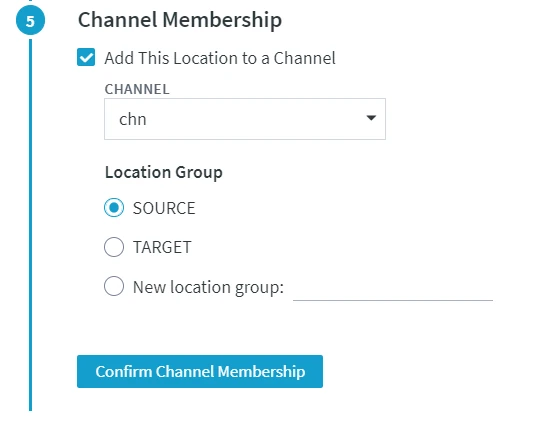
Add Location to Channel
To skip this step, unselect the Add This Location to a Channel option. In this case, the location will not be added to any of the existing channels.
-
Select a channel from the drop-down list under the CHANNEL field.
-
Select a location group (e.g. SOURCE or TARGET) to add the location to. Alternatively, create a new location group for the location. For more information about location groups, see page Location.
-
Click Confirm Channel Membership to add the location to the selected channel.
Once all the steps are completed, click Save to add the new location. Clicking Save and Create Another will add and open the Create New Location dialog to create another location. The newly added location(s) will be displayed in the Locations page.
-
-